Battery Pack: Part 2 - 3D Model Design/Fabrication
- Riley Chan

- Apr 8, 2020
- 2 min read
Updated: Apr 14, 2020
For our battery, we decided to use a lithium-ion battery pack to power our tricycle. In terms of the battery pack casing, we wanted to design something that made it easy to replace specific cells since we are utilizing recycled battery cells. Therefore, the case should by easily removed with a lid and while having all the cell contacts and wires intact. For the cells, the configuration is 10S13P (10 series 13 Parallel) for a total of 130 cells. The battery would not operate at full capacity to avoid over-heating, which is important when determining the material of the case.
For the material of the case, we decided to use 3D printing with PLA. Although PLA's temperature rating isn't extremely high (its glass transition temperature is around 60 degree celsius) it may not sound like an appropriate materal to use for this application. However, since we are not running the battery at full capacity, and 3D printing, as a manufacturing process, is fairly inexpensive and easy to use (thanks to Makerspace and certain friends with in-house 3D printers) and it is very compatible with SolidWorks, we decided to go with 3D printing for our prototype. Structural integrity of the case was not a main concern for our application since the case only needs to hold together the cells and wires, and it will simply sit in our electrical enclosure in the back of the tricycle.
For the design of the case, SolidWorks was used to create a 3D assembly of the battery pack and 3D printing was used to print the SolidWorks design. The battery pack is comprised of two packs connected to one (one 7x10 and one 6x10) since the size of the 3D printed part is limited by the printer platform. Each pack consists of 2 cell holders and 2 lids.
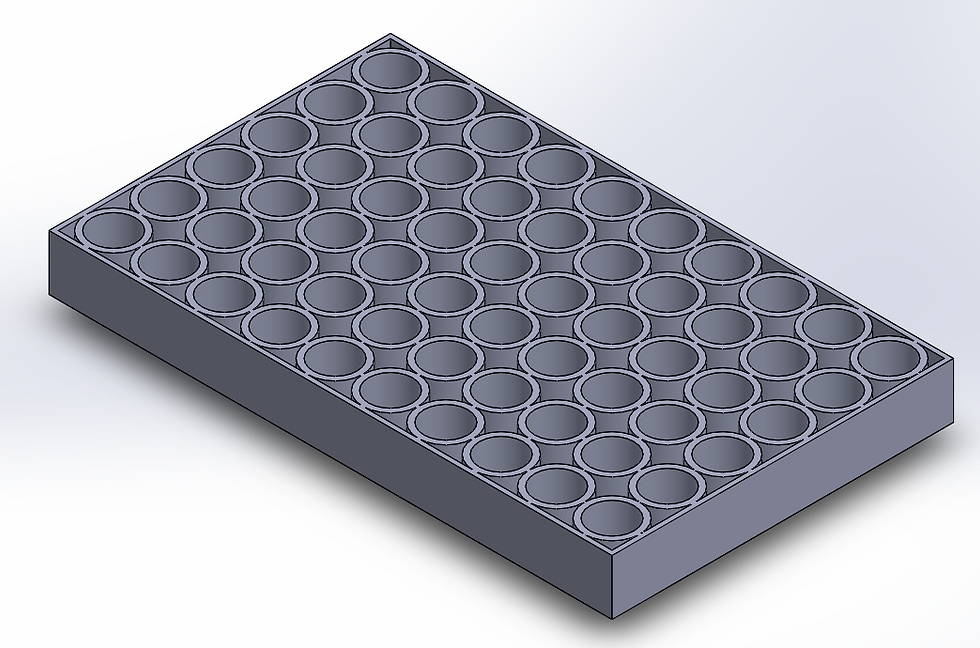

The cell holder, as can be seen above, is used to hold the cells from the bottom and top. It is important that the height of the cell holder is tall enough to keep the cell standing on its own so that it can be easily lined with the top cell holder when assembling the battery pack. For the 18650 lithium-ion cells used, the height of the holder was 22mm. Each holder consists of a cell contact that is attached by using the slits on the base of the holder and then laid flat on the base. The loops that protrude from the bottom acts as a guide and a holder for the AWG wires that are used to complete the circuitry component of the battery.

The lids act as a cover for the cell holder and prevents the wires from being exposed to the environment. The lids consists of mini rectangular windows on the top which are used to test the continuity of the battery when battery is assembled. Semi-circular holes were integrated along the sides of the lid which allow the AWG wires to extend outside of one battery pack to the other, connecting both packs. With this semi-circular design, the lid can be lifted off, when necessary, without having to cut or remove the wire in the process. The battery is then assembled by compressing the cells with the cell holders and lids from the top and bottom and kept together with tape.


Comments